
Here we describe just how to give your mountain bike a thorough cleaning.
If you've forked out for a mountain bike, you should be doing what you can to keep it running smoother for longer. One aspect of this is bike cleaning. From the cassette to the drivechain, and from the front and rear suspension to those hard to reach nooks and crannies, dirt can quickly accumulate. After a few days on the trails it may slowly turn your bike into a creaking inefficient representation of that once shiny model. In this article we take you through the mountain bike cleaning process to ensure it keeps running smoothly.
How To Give Your Mountain Bike A Thorough Cleaning.
1. What you need
First, you’ll need a good place to wash your bike. It can be your back garden, or even a bike wash stand that many trailheads have these days. Either way, the area should have good drainage where the water can quickly run off and drain.
Regarding equipment and tools, at Decathlon we stock a wide range of tools and cleaning agents and lubes which can help. At the very least, consider purchasing the following:
- A bike stand that rotates 360° that keeps your bike off the ground. It makes it much easier when removing wheels to target those hard-to-reach areas.
- A couple of dry cloths and 2 brushes, one large and soft, one small and hard. The large brush will be used to scrub the frame and wheels, while the smaller brush will be used to target those parts of the bike more difficult to clean such as the chain and cassette.
- Formulated bike cleaner specially developed for bicycles. You want to avoid using cleaning agents that can damage the paintwork.
- A chain cleaner is an optional extra. With a series of brushes and magnets they can quickly and easily clean even the dirtiest of chains. Failing this, a small hard brush will achieve the same end result.
- A hose and a water supply. Avoid using a high-powered jet wash as it will quickly remove the grease from your bearings.
2. Pre-wash - Removing the mud
The nature of mountain biking means that very often your bike will be caked in dirt after a ride. Before cleaning, consider running a hose over it to remove excess mud and dirt on the frame.
Don’t use a jet wash as it will remove all the grease from your bearings. With the hose, go around the tires and dislodge the dirt from the threads before hosing the bike from top to bottom.
3. How to wash your bike
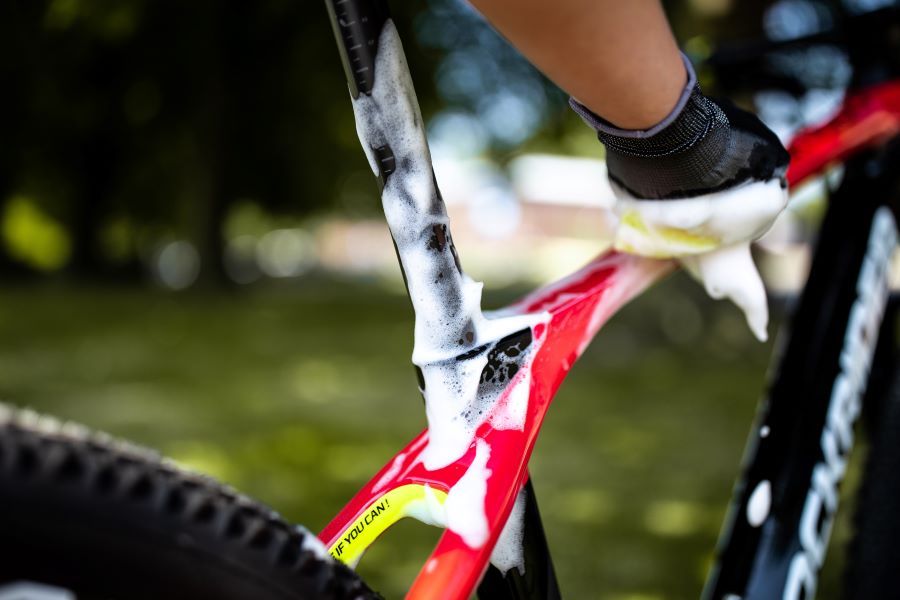
With the caked-on dirt removed, generously spray bike cleaner on the entire bicycle. Bike cleaners are specially formulated to avoid damaging the paint and brakes, so it’s important you use one specially formulated for bikes.
Once sprayed, allow the soap to sit for a few minutes to work its magic, before gently scrubbing. Ensure you scrub those hard to reach areas, behind the saddle, the cassette, chain and derailleurs. A shiny frame is easily achieved, but what’s more important is thoroughly cleaning those moving parts.
Once complete, hose the bike down from top to bottom.
4. Deep chain cleaning
The drivechain is the most important area to clean thoroughly. To clean the chain you’ll require a small stiff brush along with some degreaser, or you can use a chain cleaner. Chain cleaners are the most straightforward option. Simply add detergent and spin the chain through. Otherwise apply the degreaser and scrub the chain with a fine brush.
Ensure you scrub the derailleurs and cassette removing particles and other debris. Once cleaned, take off the wheels and scrub behind the chainstay and seatstay, cleaning out all those hard-to-reach nooks and crannies.
5. Dry and Lube
Once washed, dry off the frame and components with a dry cloth. Ensure no water remains. Be especially careful of water lying in the heads of bolts, as they will quickly rust.
Run the chain through a dry cloth to remove excess water, before running it through your fingers to ensure it’s clean.
Finally, apply lube to the chain and wipe away the excess with a dry cloth. Ensure that you don’t get any on the brake disks.
6. Finishing touches after cleaning
If you are so inclined, you can apply a silicone spray for a pleasing shine, just be careful not to get any on the disc or brake pads. Perhaps use a rag to protect these areas when you apply the spray.
One useful form of maintenance to perform after a bike clean is to apply some suspension lube spray to the rear and front suspensions. Spray it on before wiping the shock and fork with a dry rag.
Once complete, you can engage the front brake and push down on the front shock with force. This will pull up some dust and dirt trapped within which you can then wipe off. Repeat the procedure several times for a thorough cleaning of the interior.
In conclusion: A thorough mountain bike cleaning will give you much more than a shiny appearance each time you hit the trails. Regular cleaning will also ensure that your bike runs more efficiently and faster for longer. It’s important not to neglect it, as infrequent cleaning can wear the drivechain leading to more expensive maintenance bills than might otherwise be.
So, with a freshly polished bike, it’s time to hit the trails with a bike tuned in every way for maximum performance. It’s time to shine!


